Navattic Internal Experiment: Persona Specific Demos

Head of Growth & Product Marketing
There’s one question we get all the time in the sales cycle: “How can I create a demo that appeals to multiple personas or use cases?”
And while we’ve seen customers address it in many ways — branching, checklists, demo libraries — we wanted to share a recent experiment we ran on our main homepage demo that led to a 6.6x increase in MQLs and a 2x lift in demo completion.
Since we saw a lot of interest after posting our results on LinkedIn, we figured we’d share a full write-up for our customers to copy.
Experiment Timeline
It took us about a week to create the persona-based demo and set up the experiment, considering demo requests as conversion actions.
We launched the persona-based homepage demo on February 2, 2024, and ran it for nearly three weeks.
By then, we’d hit a 91.55% confidence score in Mutiny, enough to indicate statistical significance.
Persona-Specific Demo Results
The results of this campaign really demonstrate the power of personalization.
Compared to a non-tailored demo, we saw a:
- +45% lift in folks who submitted our book a demo form
- 6.3x improvement in number of MQLs
- Roughly 2x lift in demo completion
It’s too early for statistically significant results from a sales standpoint. But anecdotally, we’ve seen a slightly higher conversion rate to opportunities and closed won deals from these leads.
Steps to Replicate This Campaign
Step #1 - Validate Your Tech Stack
You’ll need three tools to reproduce this experiment:
- An interactive demo platform like Navattic.
- An A/B testing platform like Mutiny.
- A CRM to report on down-funnel metrics like MQLs or Opportunities. We used Hubspot with Navattic integration.
Once all three are in place, you’ll set up an A/B test conversion event to track your website demo request form. We used the Mutiny and Hubspot form integration for this.
Step #2 - Sync Navattic Leads to Hubspot
Next you’ll need to tie Navattic demo activity to your Hubspot cookie.
The Navattic Hubspot Tracking Script allows you to see who goes through your interactive demo even if you ungate it. The conversion (filling out a HubSpot form) will reveal who they are.
To set up the tracking script:
Configure a Custom Domain. HubSpot monitors activity on a specific domain, like "stripe.com.” If you don’t already have a Navattic Custom Domain, follow the steps outlined here.
Find your HubSpot Account ID. Log into HubSpot, then open the dropdown in the right-hand corner. Under your HubSpot Account Name, you’ll find your Account ID.

Link your HubSpot Account ID to your Navattic Demo. Go to your Navattic demo, then click the Integrations tab and scroll down to the tracking scripts section. Paste your HubSpot Account ID into the HubSpot input field. Then, publish your demo in Navattic.

Create reports. After you've enabled tracking scripts, Page Views will start showing up in HubSpot. We recommend creating attribution reports for MQLs, Opps or Closed Won revenue.
Here’s a video tutorial that walks you through how to make Navattic reports in Hubspot.
Step #3 - Create Persona-Specific Interactive Demo
Now that you’ve nailed down most of the backend logistics, it’s time to create your demo.
First, decide which personas or use cases you want to target and their aha moments. If you’re not sure who to target or what they care about, ask other teams for help.
Product, sales, and customer success should all be able to point you toward the most popular personas.
Maria Castañeda on the Lokalise team shared that her sales and CS teams “provided insights on the primary use cases, highlighting areas where customers had aha moments.”
Generally, we recommend focusing on 2 to 5 personas or use cases. More than 5 can be overwhelming.
In this experiment, we decided on Marketing, Sales, and Growth / Product.
After you’ve settled on your personas or use cases, clone your existing interactive demo and make a flow for each one.
You’ll probably need to make a few edits to copy and swap out some captures to show the right parts of your platform to the right persona. Get alignment from product or sales to be sure.
Getting feedback from peers took us a few days. But once we had that input, the demo updates were quick and easy.
Last, you can create an “Overview” flow. This flow should only have 1 or 2 steps — and one should show your branching buttons, like so:
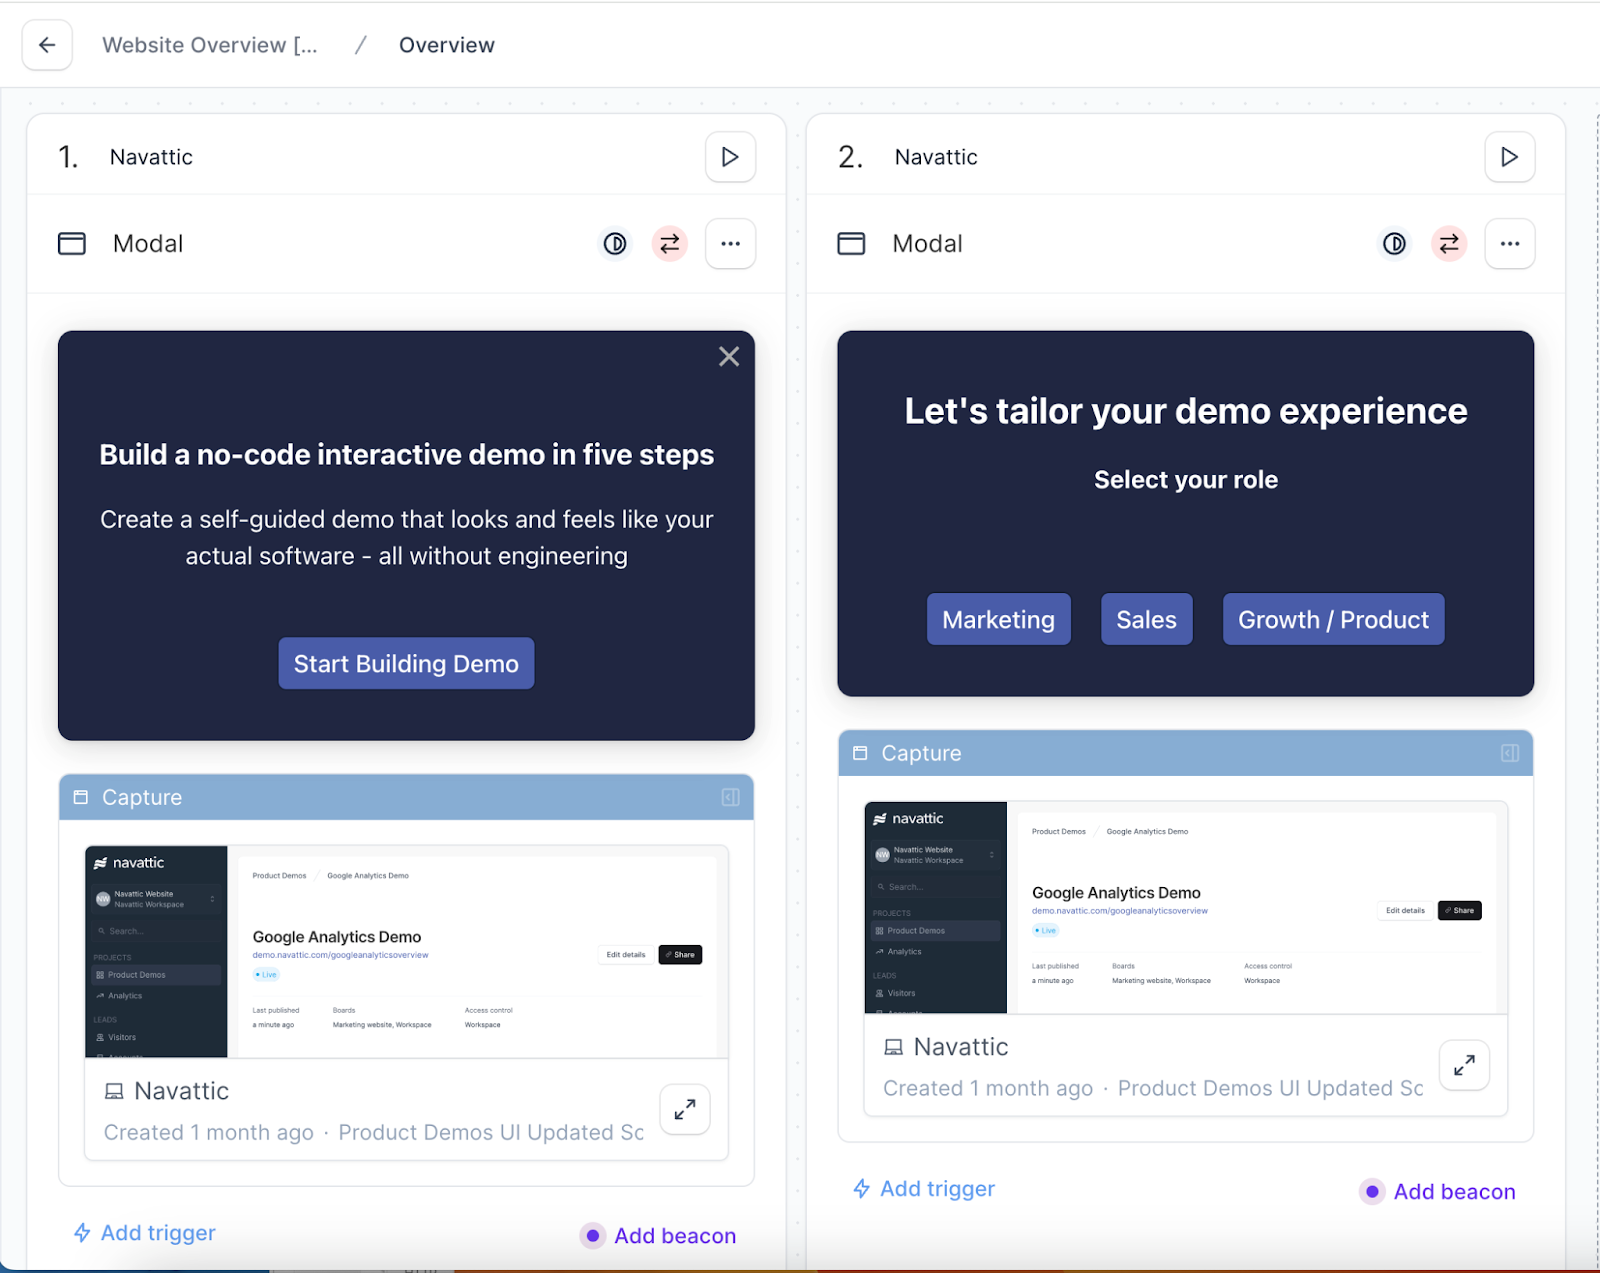
Make sure each button links out to the appropriate flow that you created above.
Step #4 - Create Hubspot Reporting to Track Results
The final step is to measure the difference between your personalized and un-personalized demo conversion actions.
Start by creating two Hubspot Lists.
One should filter by “Project Name” of your un-personalized interactive demo (the one that is not broken up by personas).
The other should filter by the Project Name of your new personalized interactive demo. In this case, “Website Overview” was the un-personalized demo, and “Dynamic Checklist” was the personalized demo.
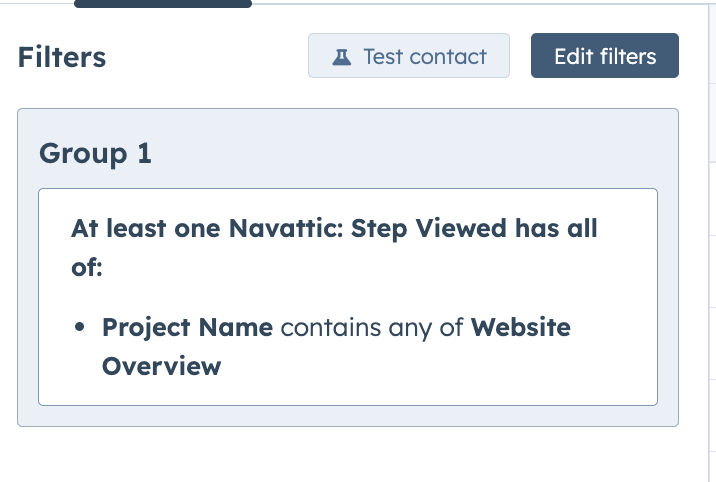
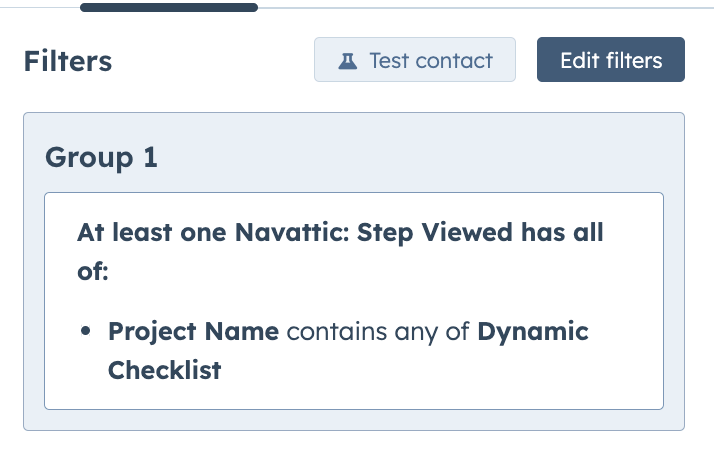
If you don’t see “Project Name” as a filtering option, take a minute to confirm you’ve set up the Hubspot and Navattic integration.
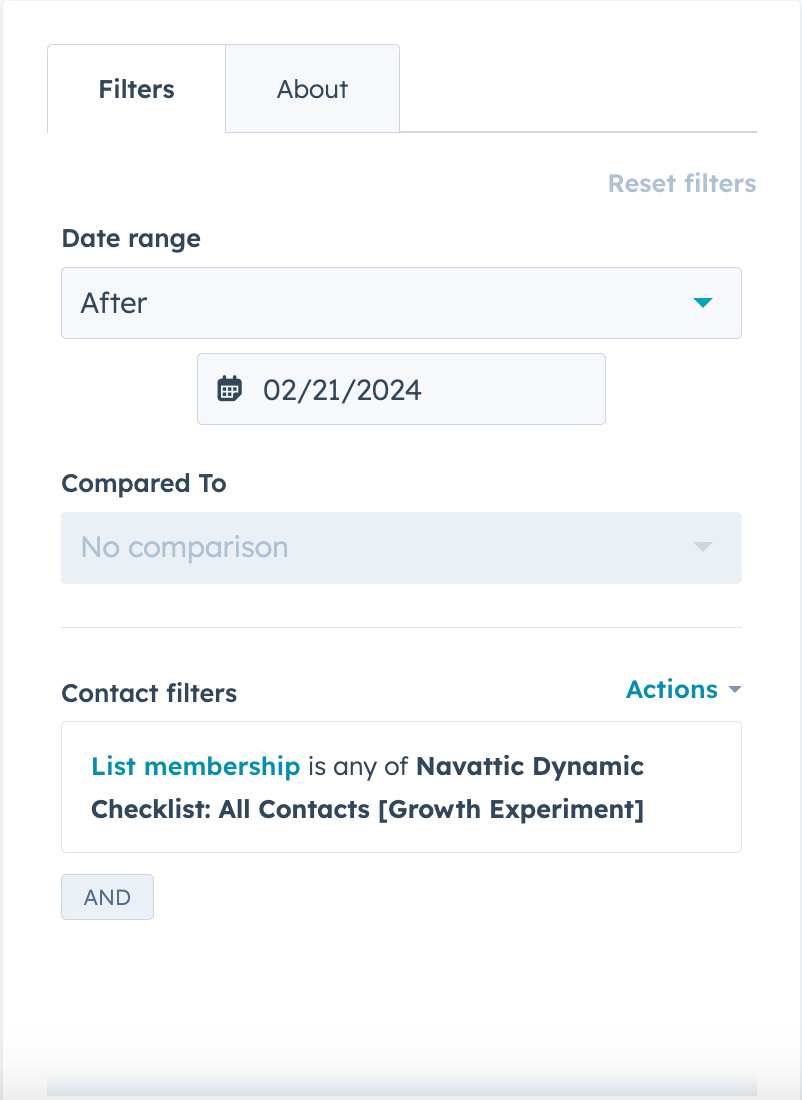
Then, create two Hubspot funnel reports. One should have List Members of the old interactive demo, and the other should have List Members of the new interactive demo.
The report filters should look like this:
At this point, you’re ready to run the experiment.
Besides boosting your MQLs and demo completion rates, persona-based demos help you collect first-party data that you can use to fuel retargeting campaigns and augment other first-party datasets you already have.
We’ve got some intent data experiments on the docket, so look out for those results and a testing breakdown soon!
